
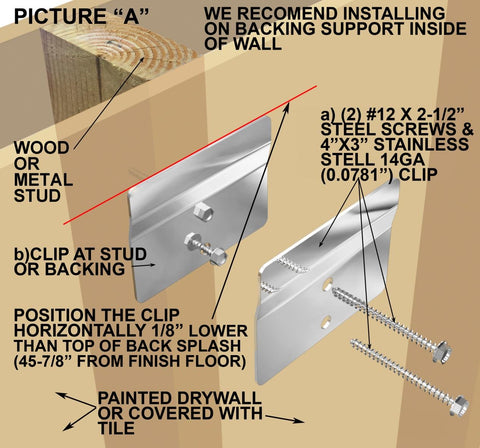
1. Wall Clips Installation
Begin installing the sink by marking where the wall clips will be anchored to the wall. Measure 45-7/8” height from the finished floor. For reference, the wall clips should be installed 1/8” lower than the actual sink height (46”). When installed, the sink should measure 46” from the top of the back splash to the finished floor.
Note: All anchoring clips should be horizontally leveled. See picture” A” for reference.
2. Wall Bracket Installation
Hang up the sink on the wall clips previously installed, then, present the wall brackets under the sink on each end, at the same time, lift the sink until is level front to back and mark bracket holes. Proceed to affix the bracket to the wall with the provided screws. For concrete walls use anchors (not included in your order). See picture “B” for reference.

3. Adhering With Silicone
After the wall brackets are screwed to the wall and sink setting on the brackets apply aluminum gray or transparent silicone (not included). Make sure that the silicone covers all the bracket’s top surface area and around the bracket to the bottom of the sink Picture “C”. Make sure it is free of any gaps or spaces. Lastly proceed to silicone the back splash to the wall.

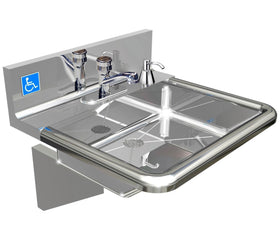
Notes: Height from finished floor is 46” for the REGULAR sink with a 10” back splash with no mirror installation.
For best results, install backing at wall: 5/8” or thicker plywood; 14-gauge galvanized sheet metal or wood blockings.